Diatomaceous earth dusters play a pivotal role in maintaining a pest-free environment. These versatile tools are invaluable for distributing diatomaceous earth, a natural and non-toxic substance that effectively combats a wide range of pests. However, their effectiveness depends greatly on proper maintenance. In this guide, we will delve into the significance of diatomaceous earth duster maintenance and its impact on the longevity and efficiency of your pest control efforts.
Why Diatomaceous Earth Duster Maintenance Matters?
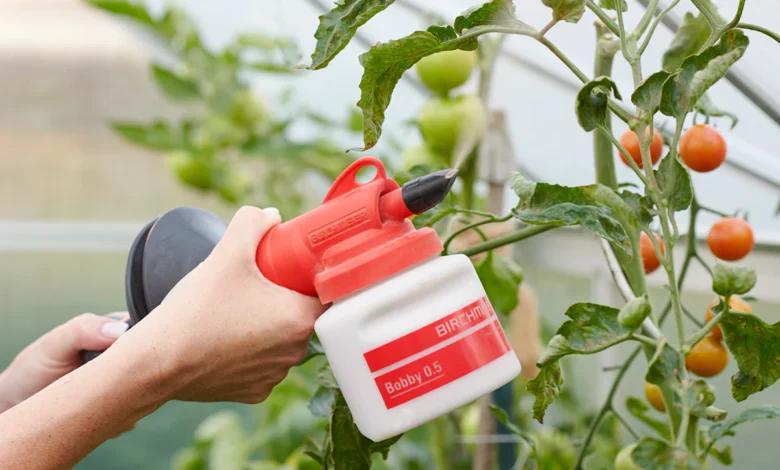
Diatomaceous earth dusters are indispensable assets in the realm of pest control. They allow for the precise application of diatomaceous earth, a fine powder composed of fossilized aquatic organisms known as diatoms. This substance is renowned for desiccating and eliminating various pests, such as insects, arachnids, and even small rodents while remaining harmless to humans and pets. The duster serves as the vehicle for delivering this potent weapon against pests.
Improper maintenance of your diatomaceous earth duster can result in a host of issues that compromise its performance. Clogs, blockages, and wear and tear on moving parts can hinder the even distribution of diatomaceous earth, rendering your pest control efforts less effective. Furthermore, neglecting maintenance may lead to the premature degradation of your duster, necessitating costly replacements.
Tools and Materials for Duster Maintenance
Before embarking on your diatomaceous earth duster maintenance journey, assembling the necessary tools and materials is essential. These include:
- Soft brushes for dusting off excess diatomaceous earth and debris.
- Mild, non-abrasive cleaning solutions for removing stubborn residues.
- Gaskets, seals, or any components may need replacement due to wear and tear.
Having these items on hand will make the maintenance process more efficient and ensure you can promptly address any issues.
Safety Precautions
As with any maintenance task, safety should always be a top priority. When handling diatomaceous earth, it’s essential to follow these safety precautions:
- Wear appropriate personal protective equipment, including gloves and a mask, to prevent inhalation of diatomaceous earth particles.
- Work in a well-ventilated area to minimize dust exposure.
- Store diatomaceous earth in a dry, cool place away from children and pets.
- Avoid contact with eyes and skin, and wash thoroughly if any contact occurs.
By adhering to these safety guidelines, you can protect yourself and those around you while maintaining your diatomaceous earth duster.
Cleaning the Duster
Properly cleaning your diatomaceous earth duster is a fundamental aspect of maintenance. Follow these steps to ensure your duster remains in peak condition:
- Begin by disassembling your duster according to the manufacturer’s instructions. This typically involves removing the hopper and any detachable parts.
- Shake out any excess diatomaceous earth from the duster. Use a soft brush to gently remove any remaining powder from the interior and exterior of the duster.
- With the duster disassembled, clean the interior components, such as the dispenser mechanism and any chambers, with a brush and a mild cleaning solution. Be thorough but gentle to avoid damage.
- Wipe down the exterior of the duster with a damp cloth or sponge, taking care not to soak it excessively. Ensure that all residues are removed, and the duster is clean and dry.
- Allow all components to air dry completely before reassembling the duster. Once reassembled, perform a quick function check to ensure everything is working smoothly.
Checking and Replacing Seals and Gaskets
Seals and gaskets may not be the most visible components of your diatomaceous earth duster, but they play a crucial role in its performance. Here’s why they matter and how to address them:
- Seals and gaskets are integral to maintaining an airtight and consistent diatomaceous earth flow within your duster.
- They prevent unwanted leaks, ensure precise powder distribution, and contribute to overall efficiency.
- Over time, these components can deteriorate due to wear and tear, potentially compromising your duster’s effectiveness.
Regularly inspect the seals and gaskets for signs of wear and tear. Look for cracks, tears, or deformities that may impact their sealing capabilities. A simple visual examination can often reveal if replacement is necessary.
If you find that seals or gaskets are damaged or compromised, it’s crucial to replace them promptly to maintain the integrity of your diatomaceous earth duster.
Follow these steps:
- Identify the specific seals or gaskets that need replacement by referencing the manufacturer’s manual or contacting customer support.
- Source replacement parts from reputable suppliers or the duster manufacturer.
- Disassemble the duster as necessary to access the affected components.
- Carefully remove the old seals or gaskets and discard them.
- Install the new seals or gaskets, ensuring a secure and snug fit.
- Reassemble the duster according to the manufacturer’s instructions.
- Perform a function check to confirm that the seals and gaskets are now functioning correctly.
Regularly checking and replacing seals and gaskets when needed will help maintain your diatomaceous earth duster’s performance and prevent potential leaks or inconsistent powder distribution issues.
Conclusion
The diatomaceous earth duster maintenance is fundamental to effective pest control and long-lasting equipment. You can ensure your duster remains in optimal condition by following the provided tips for cleaning, lubricating moving parts, and checking and replacing seals and gaskets.
Maintenance enhances the performance of your diatomaceous earth duster and offers significant economic benefits. A well-maintained duster is more cost-effective in the long run compared to the expense of frequent replacements or reduced pest control efficacy.